In this blog, I would like to share my recent experience upgrading VMware Cloud Foundation (VCF) from version 9.0.2 to 9.1.
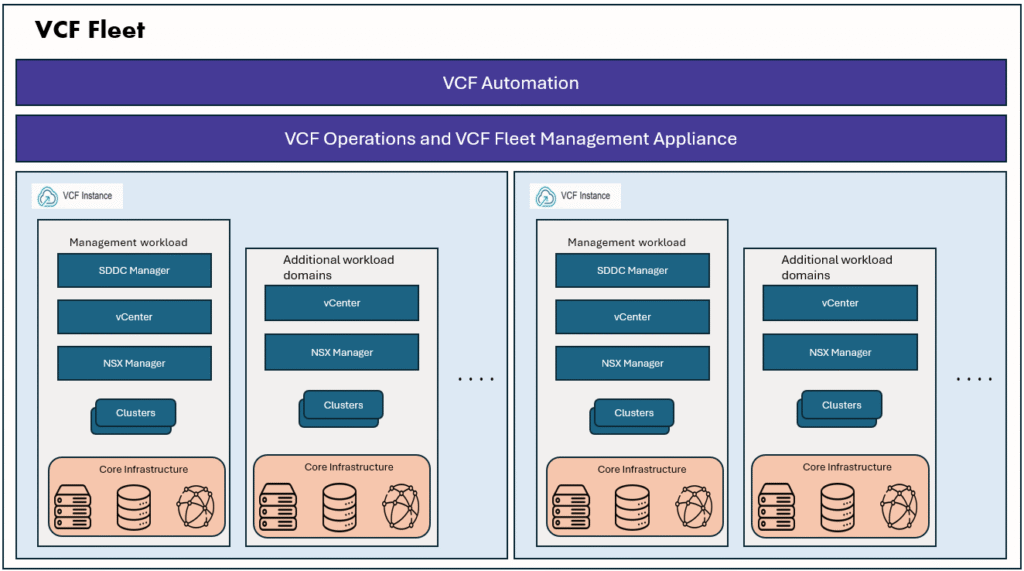
VCF 9.1 introduces several significant architectural changes, including the introduction of VCF Management Services (VMS), the new License Server component, and the removal of the Fleet Management Appliance. These enhancements make the upgrade process from VCF 9.0.x to VCF 9.1 slightly different from previous VCF upgrade workflows.
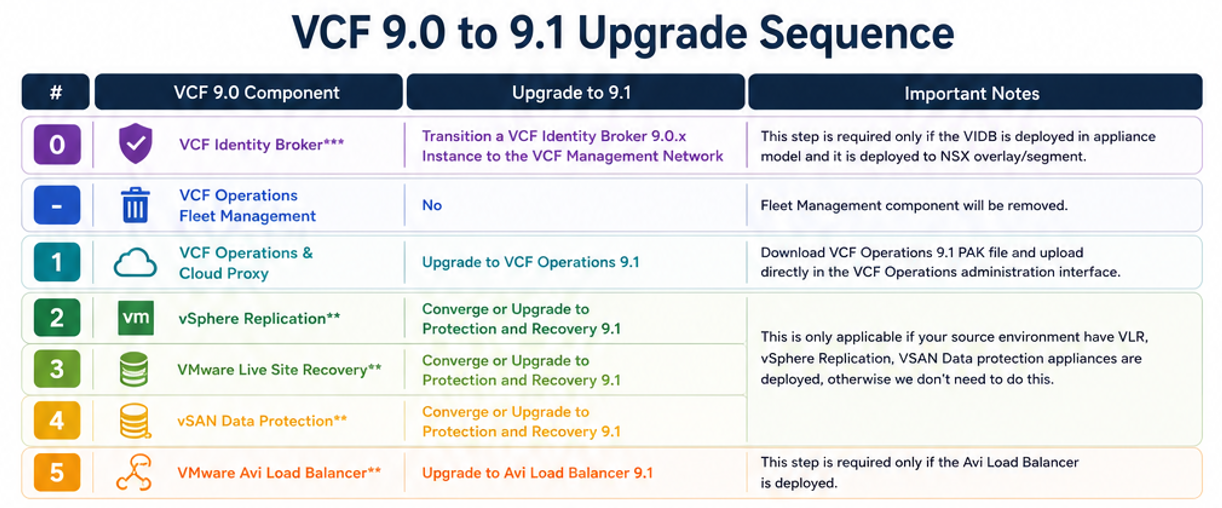
Before starting upgrade, let’s look at the Broadcom techdocs to understand the upgrade sequence and plan for the pre-requisites.
VCF 9.1 upgrade preparation:
- Read the Broadcom techdocs and understand the upgrade sequence
- Download the VCF 9.1 operations PAK file
- Take the snapshots/backups for all the VCF components before starting the upgrade
- Make sure that you completed the VCF upgrade prechecks in VCF 9.0 operations and ensure there are no issues.
- Make sure the online depot/offline depot configured and working correctly in SDDC Manager and also in VCF operations console.
- If dark site, download the required bundles using VCF download tool.
- Make sure VCF Identity broker is already on VCF management network. (Step 0).
- A temporary IP for vCenter server upgrade
- Create ESXi image and import into VCF Ops/SDDC Manager for ESX upgrade.
- VCF Ops admin password, VCF Fleet manager root password
Upgrading VCF 9.0.2 to VCF 9.1
Step 1: Upgrade VCF Operations 9.0 to 9.1
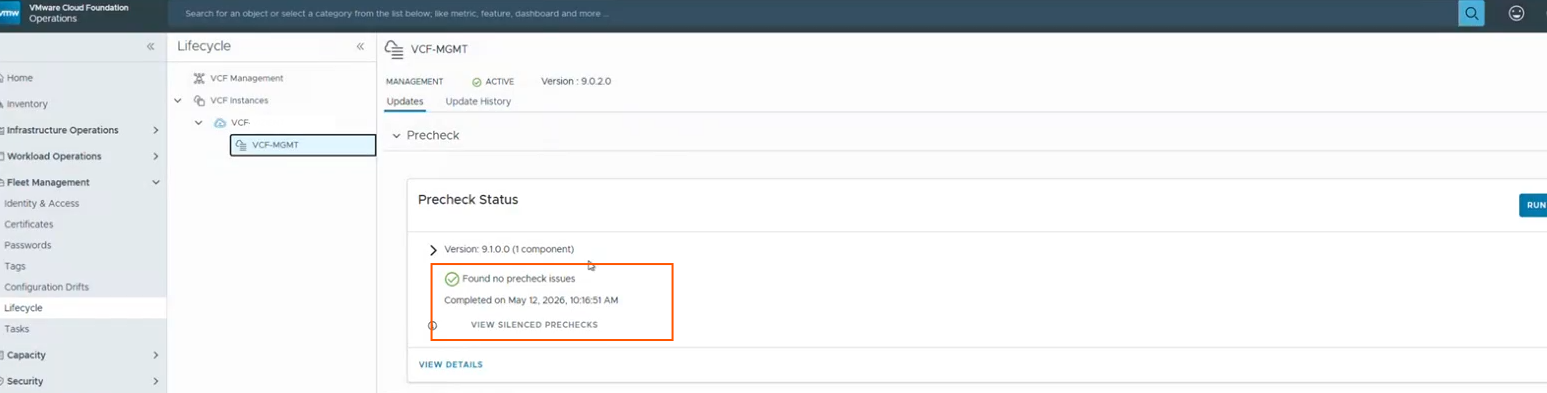
- Complete the VCF upgrade precheck and confirm that there are no issues found.
2. Download the VCF Operations 9.1 upgrade PAK file from the Broadcom Support Portal.
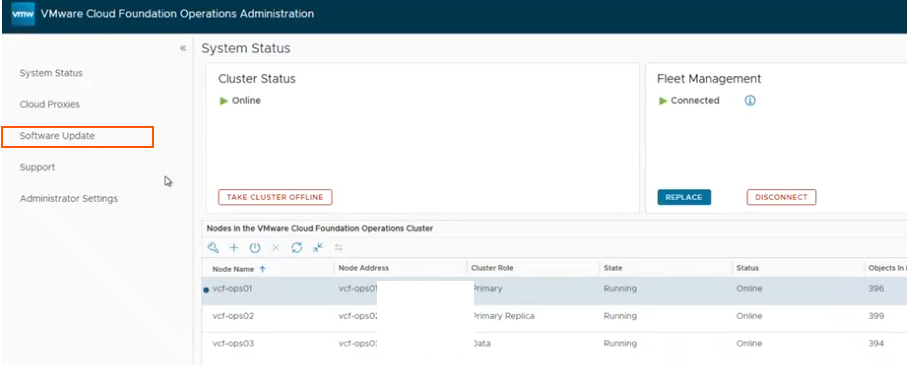
3. Log in to the VCF Operations admin interface on the primary node https://<primary-node-FQDN>/admin
4. Navigate to Software Update and select Install a Software Update.
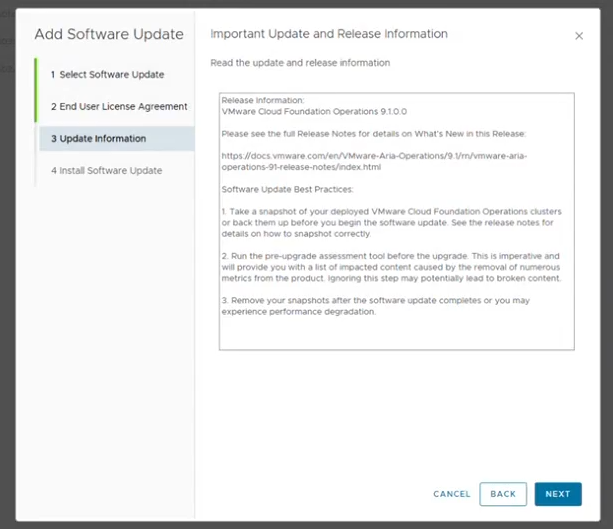
5. Upload the VCF Operations 9.1 PAK file and follow the upgrade wizard.
6. Review and accept the license agreement.
7. Start the upgrade and monitor progress.
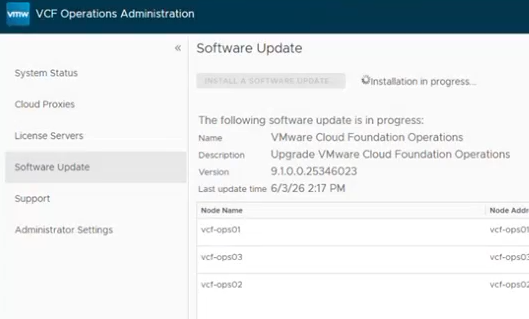
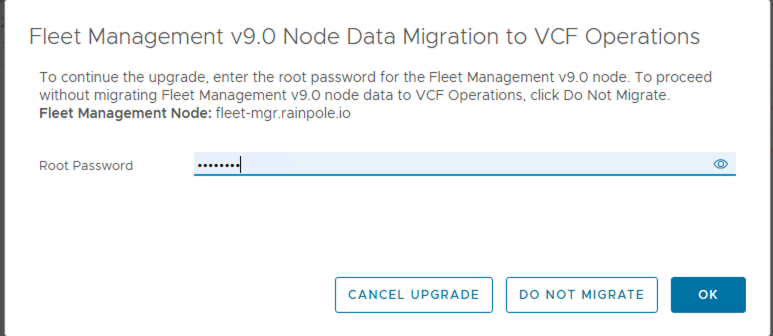
8. During the upgrade, it will migrate the Fleet Management Appliance inventory to VCF operations 9.1, it will prompt for the root password of the fleet management appliance, provide it when it prompted for it.
9. Wait for all upgrade tasks and validations to complete. The admin GUI may restart multiple times during the process.
10. Confirm that all nodes are online and the VCF operations cluster status is healthy. Verify that the VCF Operations cluster is running version 9.1.
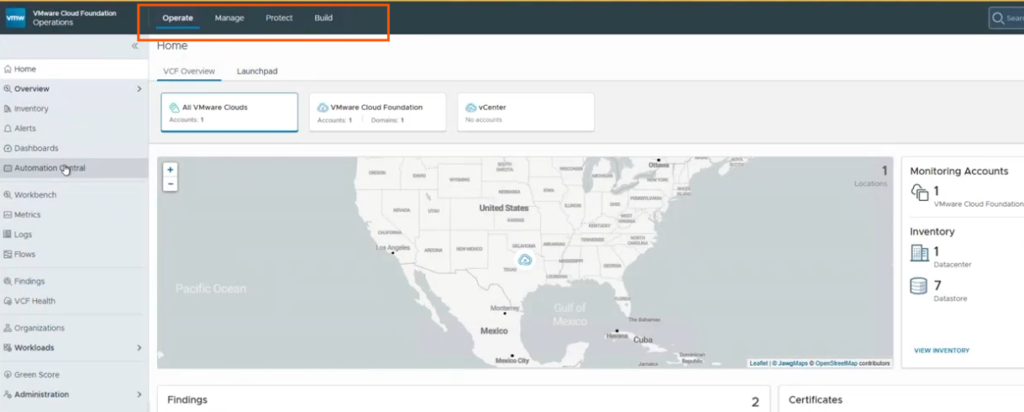
Once this is done, you can login to VCF operations 9.1 console and see the changes in the GUI and also notice that VCF operations fleet management VM is now powered off and can be deleted later.
Steps 2, 3, 4 and 5 are skipped as we don’t have Replication, Data protection or AVI load balancer deployed in this environment.
Next, we will proceed with Step 6 “SDDC Manager upgrade”.
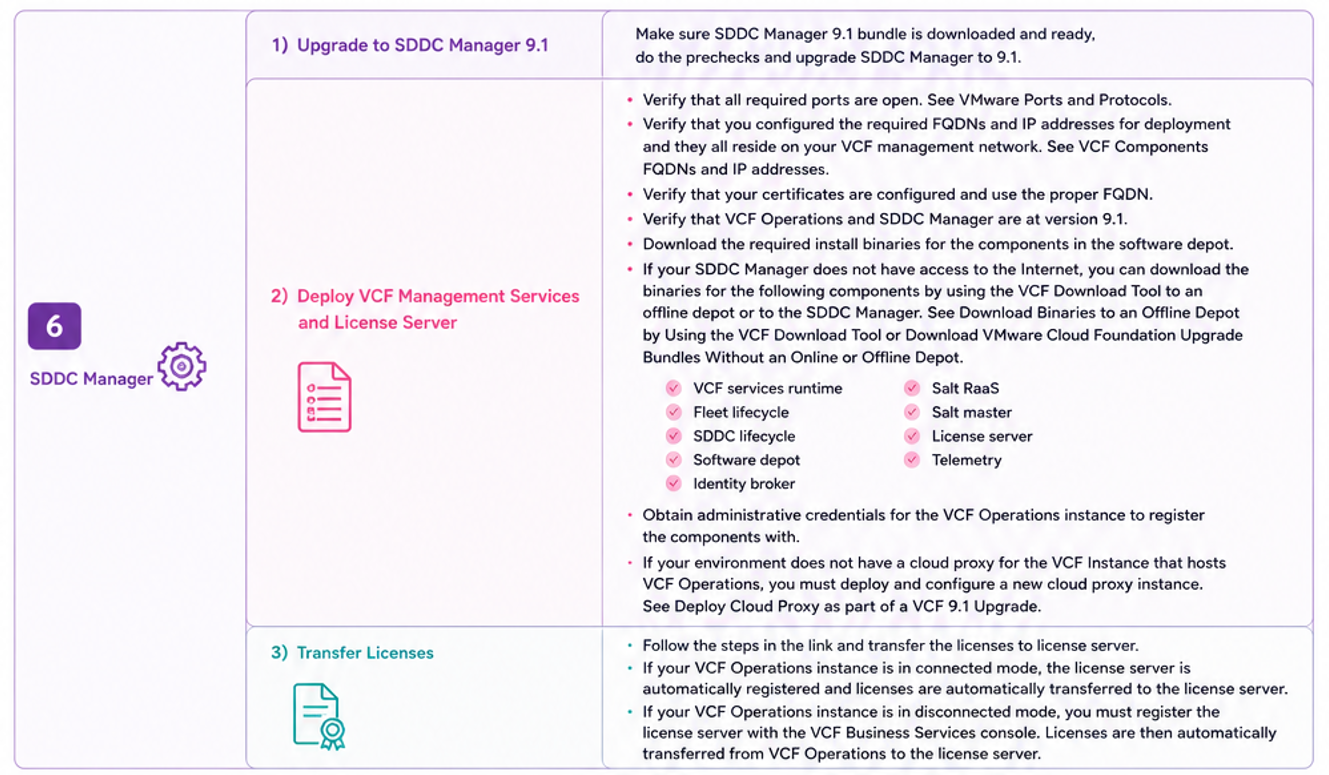
Step 6: Upgrade SDDC Manager
Download package by logging into VCF Ops > Build > Lifecycle > Domain > SDDC Manager Updates > Download.

Once the bundle is downloaded, please run the pre-checks and then proceed to click on UPDATE NOW button to start the SDDC Manager upgrade.
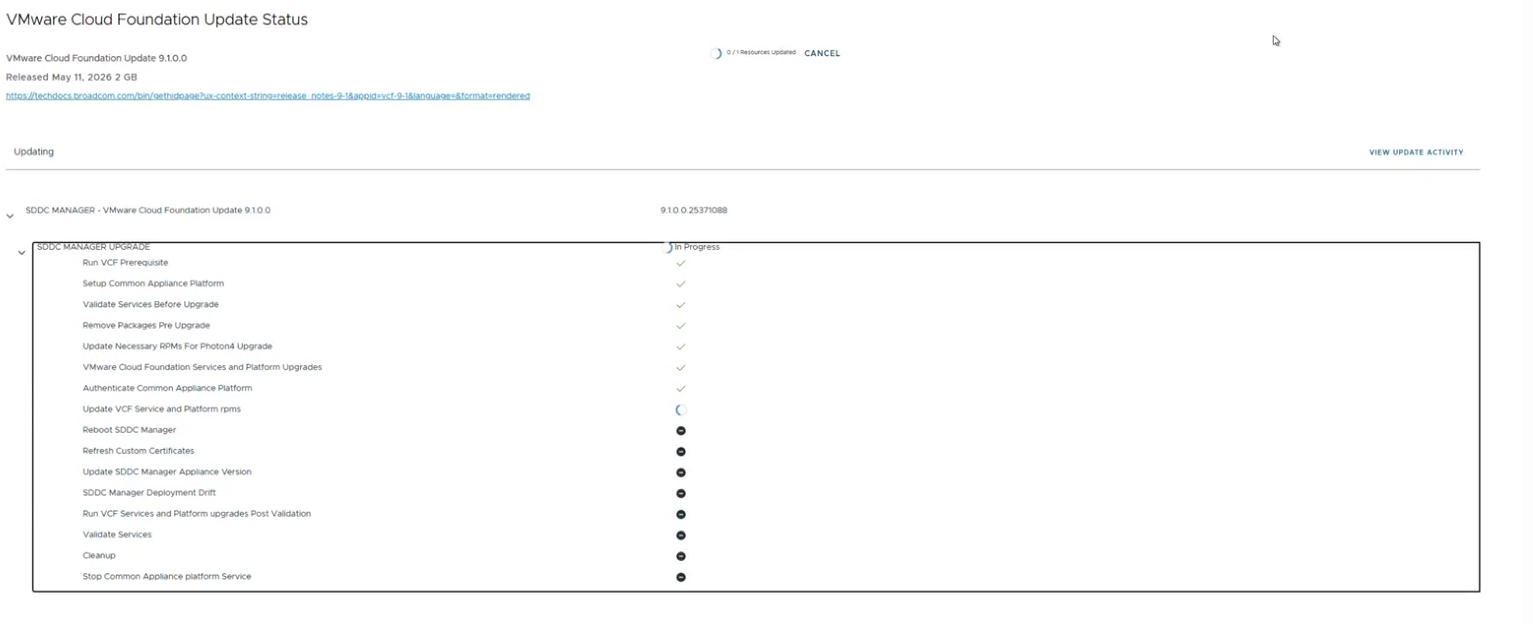
Once complete, click finish.
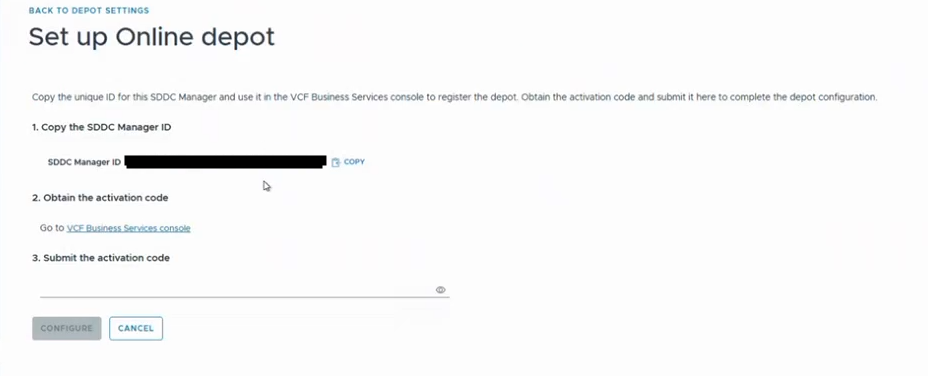
Then we will login to SDDC Manager GUI and update the depot settings (Online/Offline). If dark site, we have to manually transfer the VCF 9.1 binaries to sddc manager using VCF download tool.
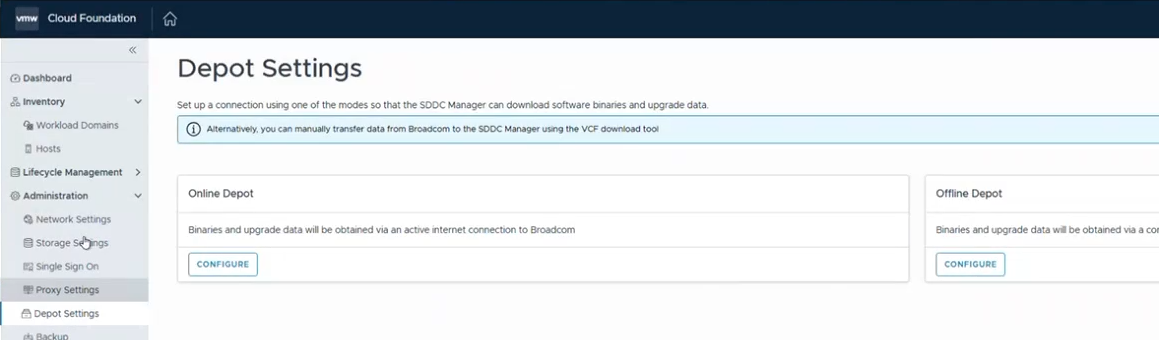
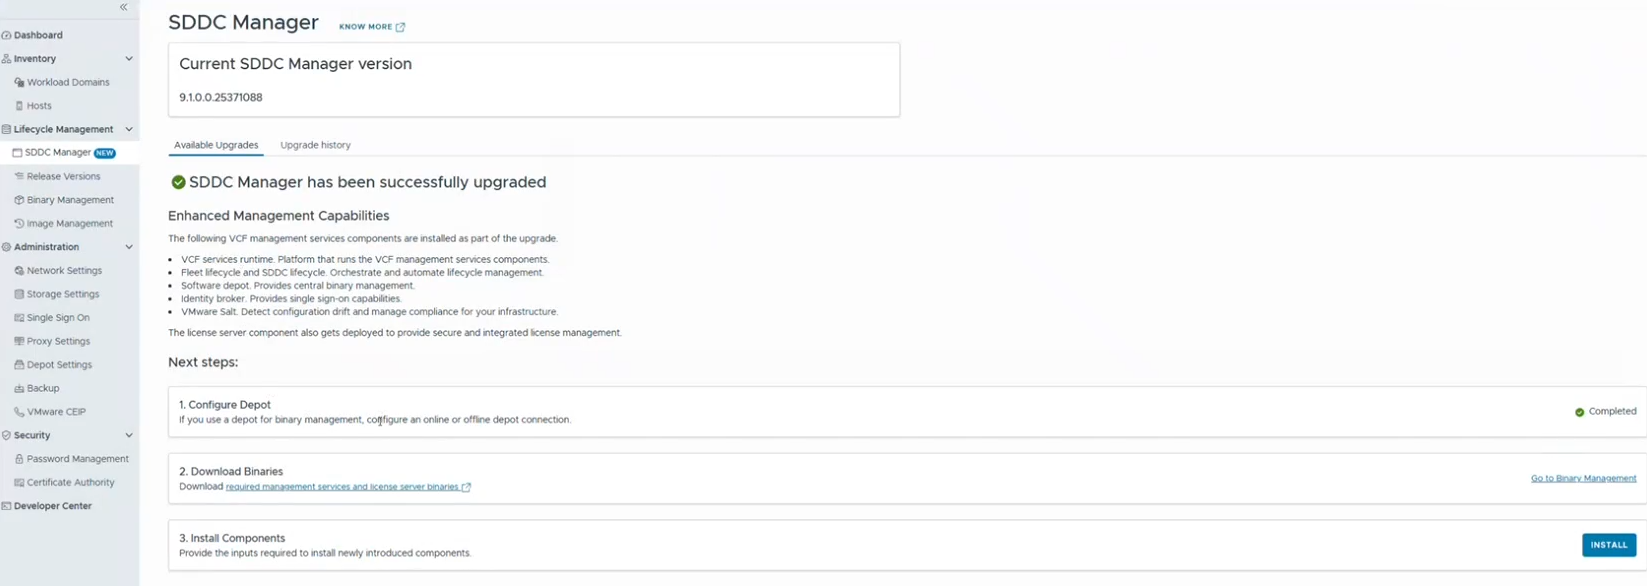
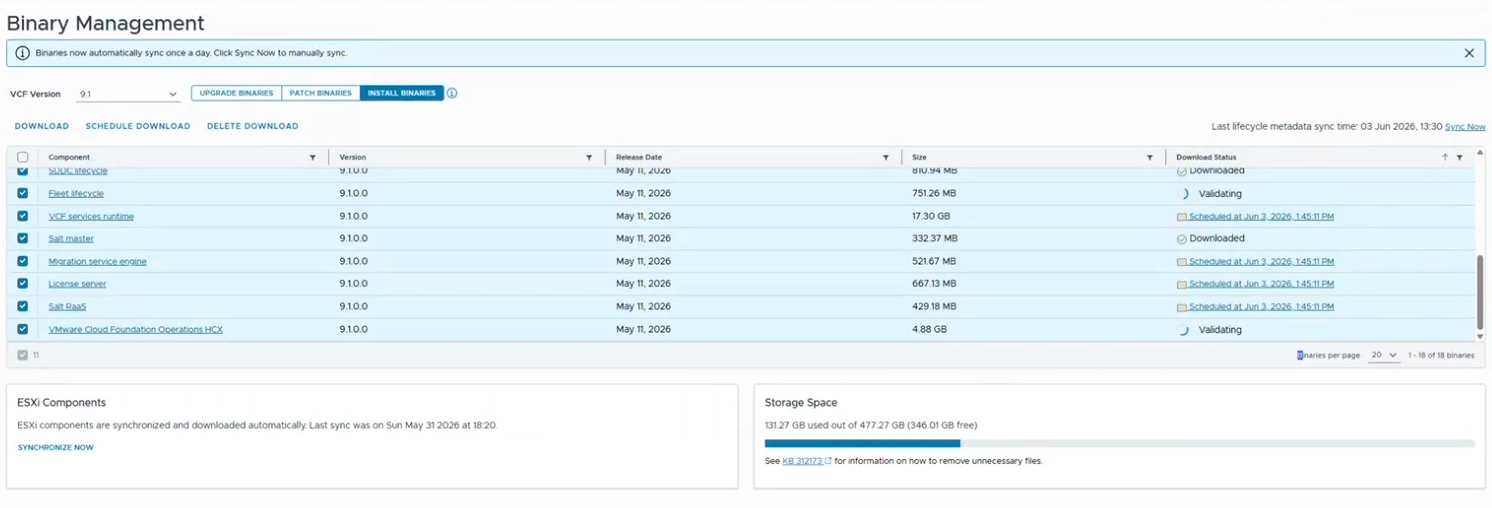
Once the depot connection is active, navigate to binary management and download upgrade binaries, as well as install binaries. It should download 18 components which includes the VCF Manager services components.
VCF services runtime components
- Fleet lifecycle
- SDDC lifecycle
- Software depot
- Identity broker
- Salt RaaS
- Salt master
- License server
- Telemetry
- VCF services runtime
Next we need to make sure all required IPs and FQDNs are available.
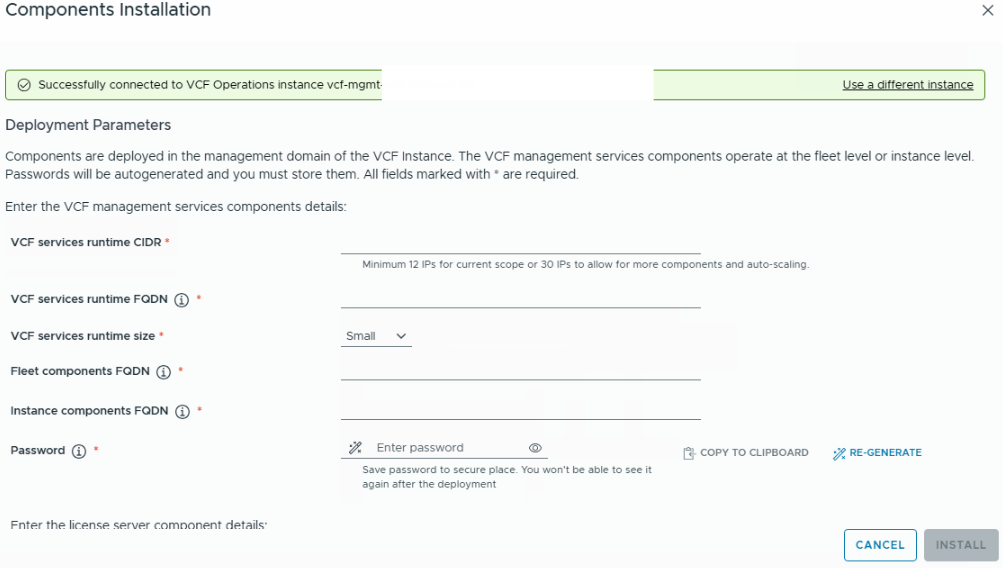
Before deploying VCF Management Services, ensure that all required FQDNs resolve to unique, unused IP addresses. These IP addresses must not fall within the IP ranges allocated to the VCF Management Services nodes.
| Setting | Description |
|---|---|
| VCF Services Runtime CIDR Block | Allocate a minimum /28 network (12 usable IPs) for deployment. A /27 network (30 usable IPs) is recommended to allow future scaling and additional VCF Management Services components. |
| VCF Services Runtime FQDN | FQDN for the VCF Services Runtime component. It must resolve to a unique IP address outside the runtime CIDR block. The hostname is used as a prefix for the associated VMs and objects. Use lowercase characters only. |
| Fleet Component FQDN | FQDN for fleet-level services such as Fleet Lifecycle, Software Depot, and Salt RaaS. It must resolve to a unique IP address outside the runtime CIDR block. Use lowercase characters only. |
| Instance Component FQDN | FQDN for instance-level services such as SDDC Lifecycle, Salt Master, Real-Time Metrics, Real-Time Metrics Store, and Telemetry. It must resolve to a unique IP address outside the runtime CIDR block. Use lowercase characters only. |
| VCF Services Runtime Password | Password for the local administrative account (admin@vsp.local) used during deployment and integration with other VCF components. |
| Identity Broker FQDN | FQDN for the Identity Broker service. It must resolve to a unique IP address outside the runtime CIDR block. Use lowercase characters only. This is required when no VCF Identity Broker exists or when Workspace ONE Access is being used. |
| License Server FQDN | FQDN for the License Server. It must resolve to a unique IP address outside the runtime CIDR block. |
Once we are ready with these details, click on INSTALL button to install components.
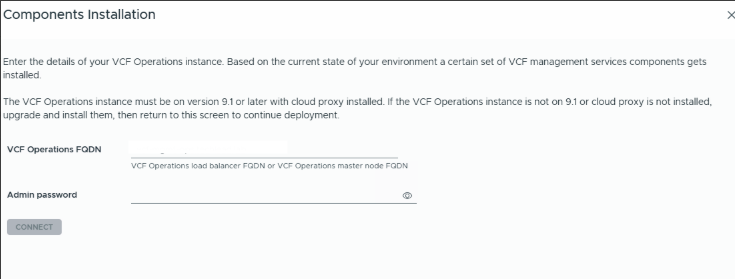
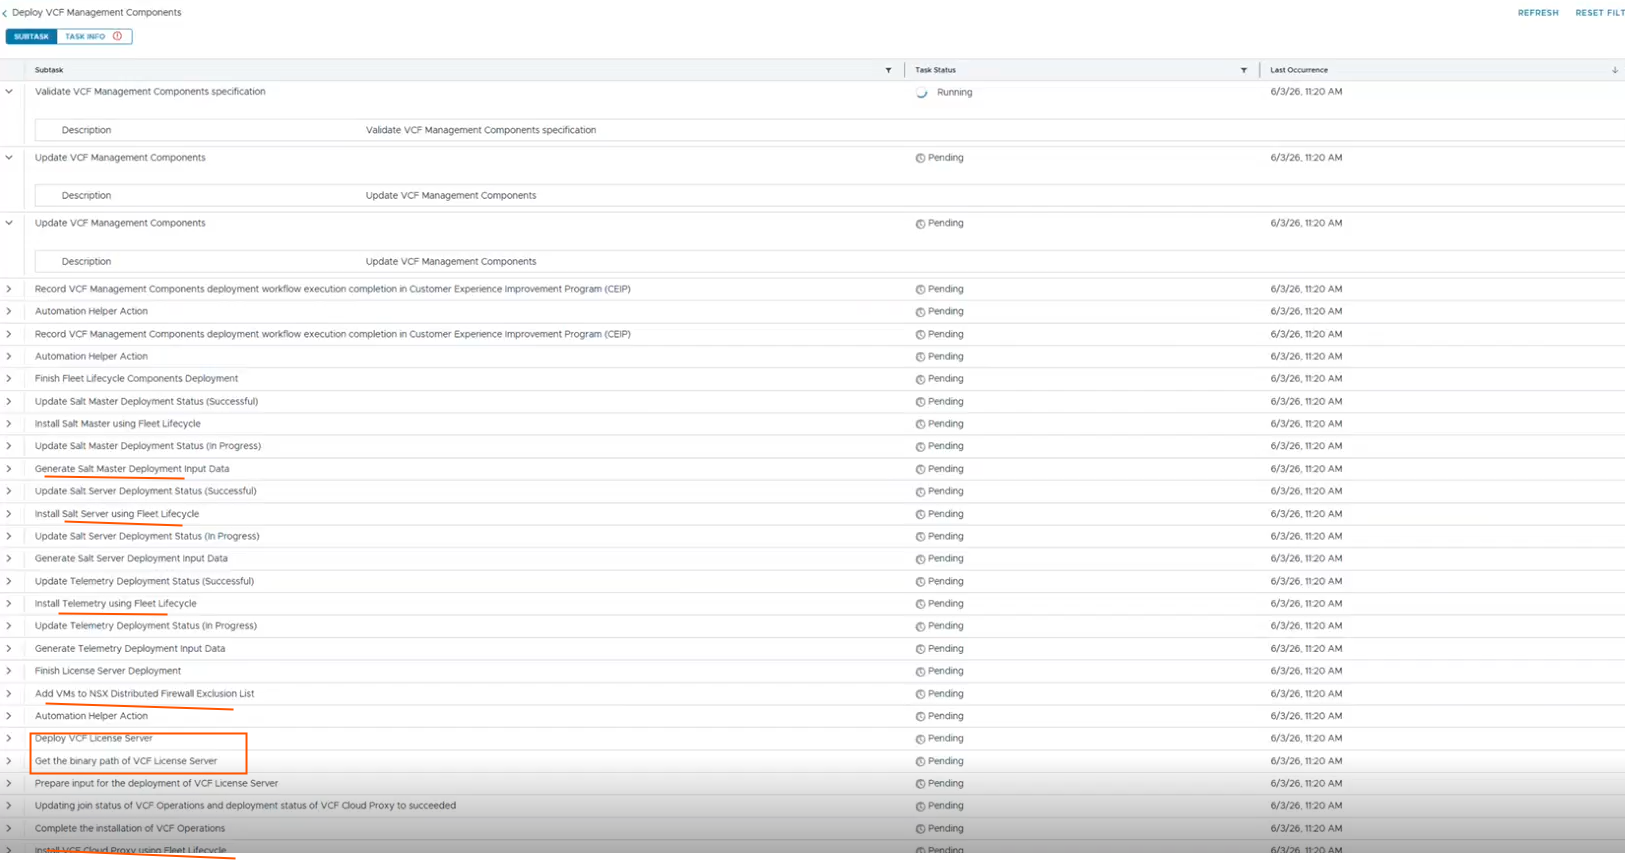
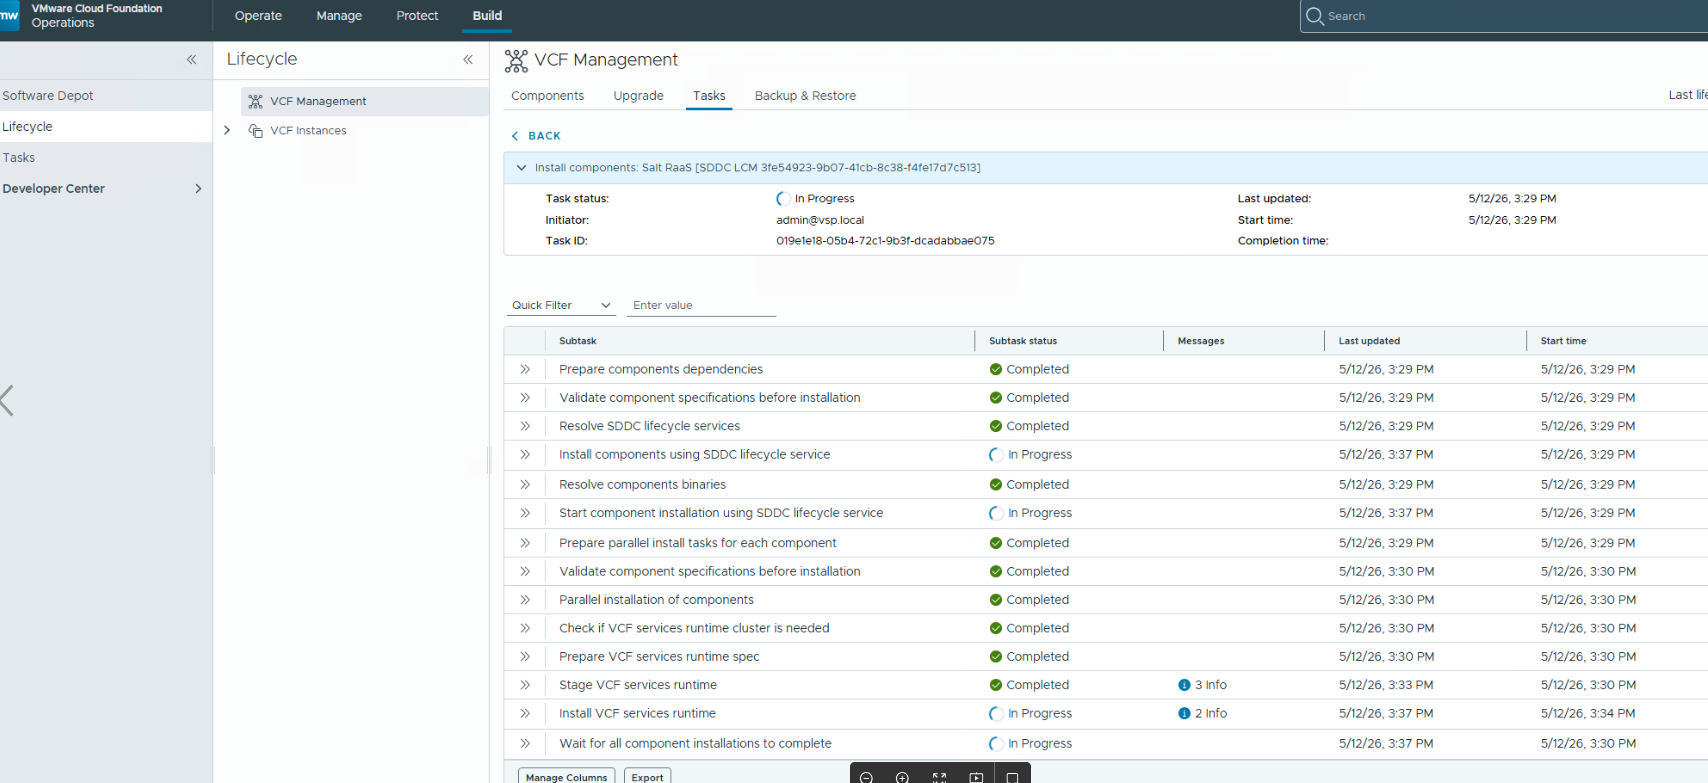
Once the install components workflow is started, you can monitor this in SDDC Manager tasks panel or in VCF operations –> Build –> Life cycle –> VCF Management –> Tasks.
Once the install components task completed, we can proceed to transfer the licenses to license server by following the steps in the documentation.
Next steps:
We should proceed to VCF Identity broker Upgrade.
Login VCF Operations console and navigate to Build –> Lifecycle –> VCF Management –> Upgrade and run the Pre-Check. Proceed to upgrade VIDB after prechecks completed successfully.
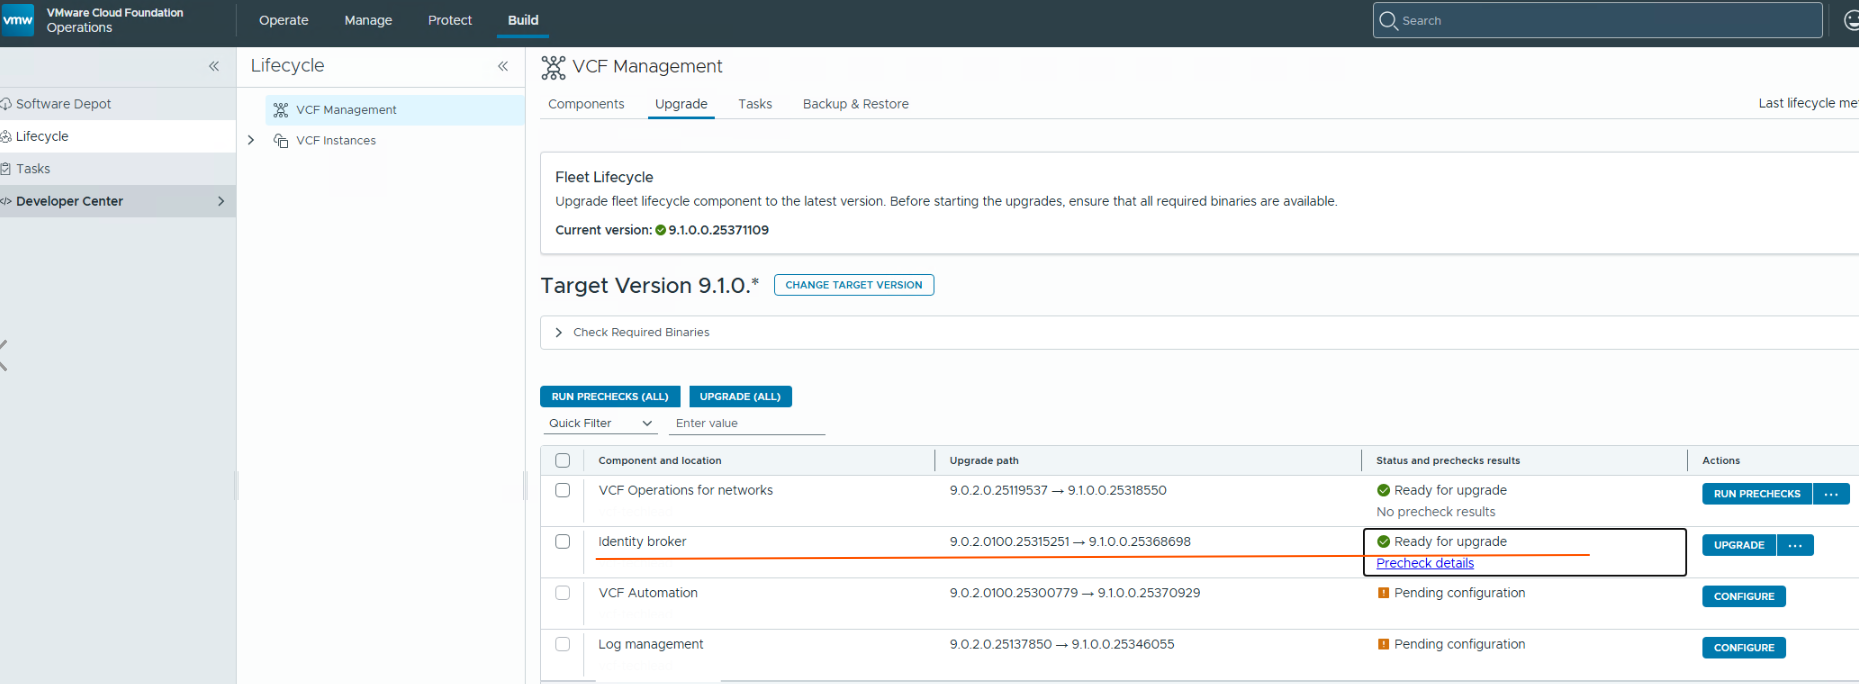
During this process, the vIDB service is moved into the VCF Management Services cluster, after that the standalone vIDB cluster is shut down and no longer used.
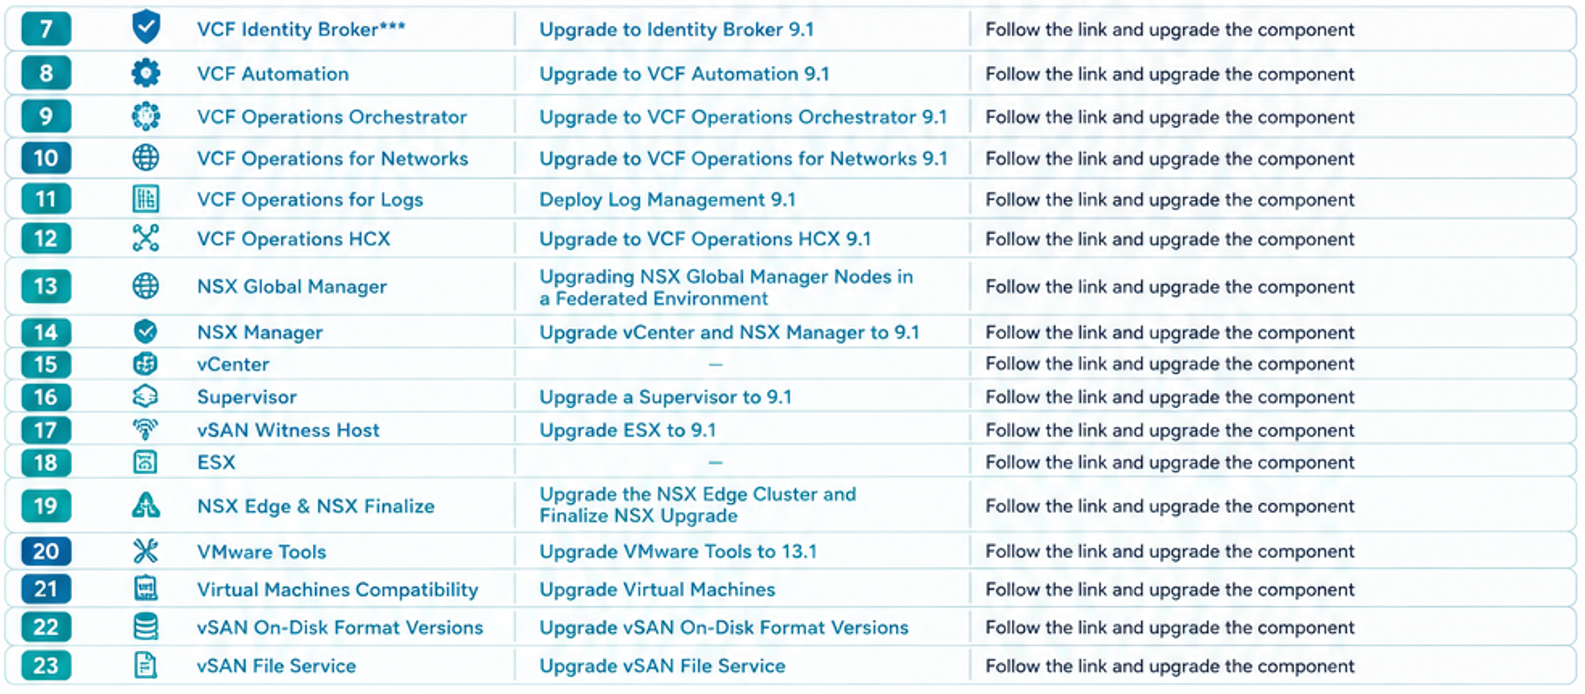
If your environment includes additional management components such as VCF Automation, Operations for Networks, or Operations for Logs, you can upgrade them in the recommended upgrade sequence as mentioned in the table at the beginning of this blog.
After this, we can upgrade the VCF core components like NSX Manager, vCenter and ESXi hosts.
From here, the process is very similar to the upgrade process in previous VCF versions.
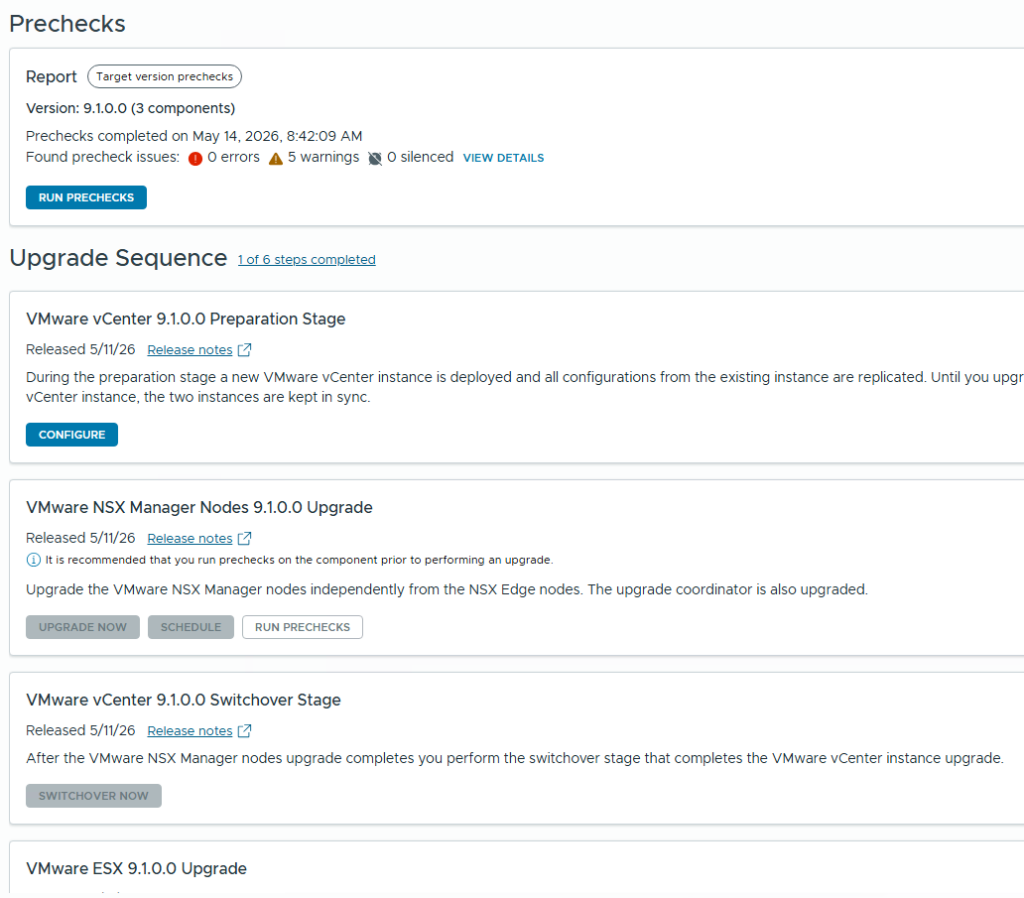
Navigate to Build –> Lifecycle –> VCF Instance –> Management domain –> Upgrades –> Run Prechecks.
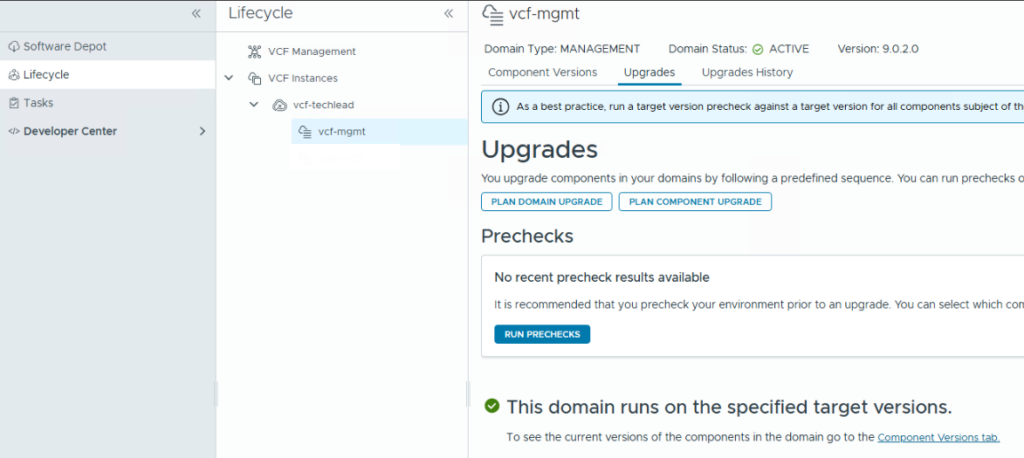
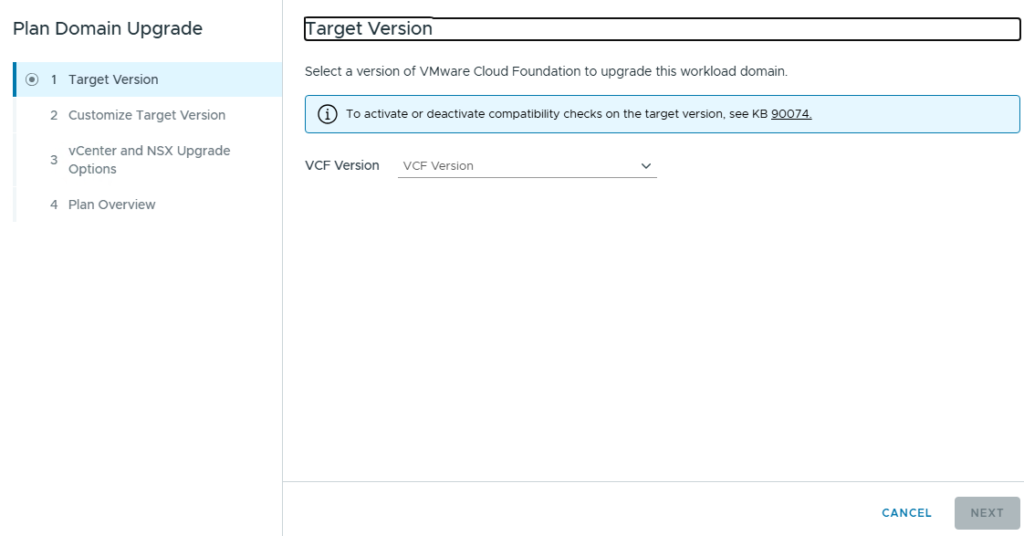
Once the prechecks are completed, plan the domain upgrade.
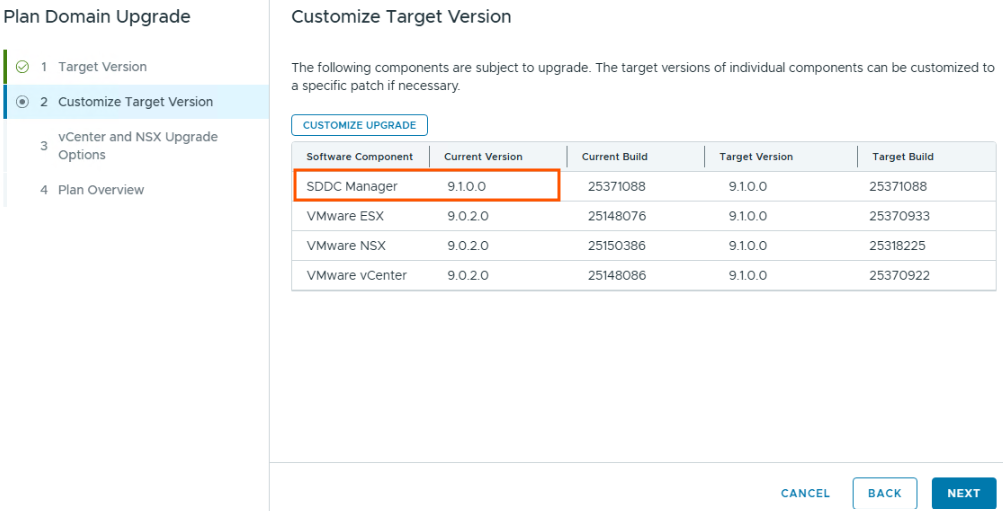
Note SDDC Manager is already upgraded to 9.1 only NSX, vCenter, ESXi will be upgraded.
One notable change in VCF 9.1 is the upgrade order. The NSX Manager cluster is upgraded first, the NSX host vibs are now bundled with the ESX upgrade, and the NSX Edge clusters are upgraded at the end of the sequence.
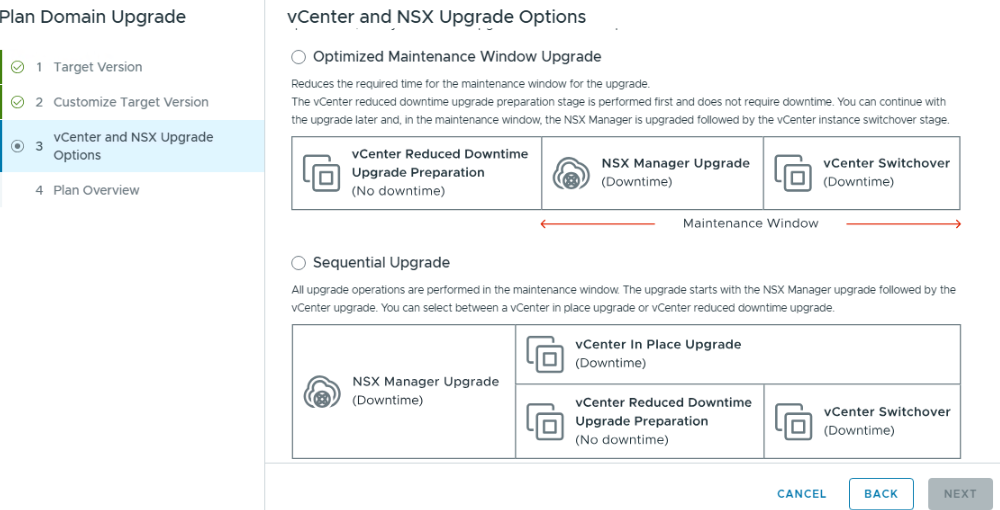
If we choose the Optimized upgrade approach: The sequence is like below:
vCenter upgrade prep –> NSX upgrade (including NSX UC) –> vCenter switchover –> ESX upgrade –> NSX Edge cluster upgrade.
If we choose the Sequential upgrade approach: The sequence is like below:
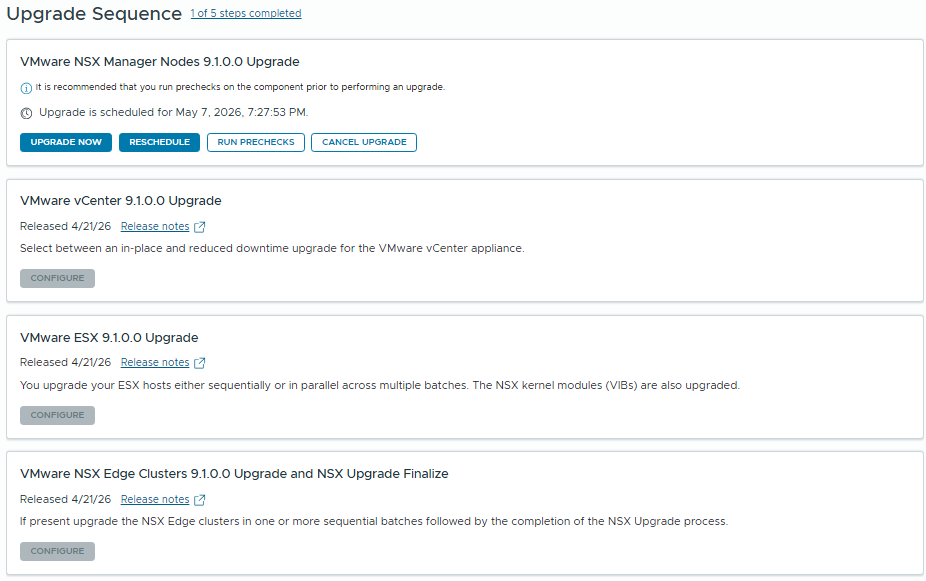
Please note that for vCenter upgrade you need to have a temporary Ip address in the same subnet.
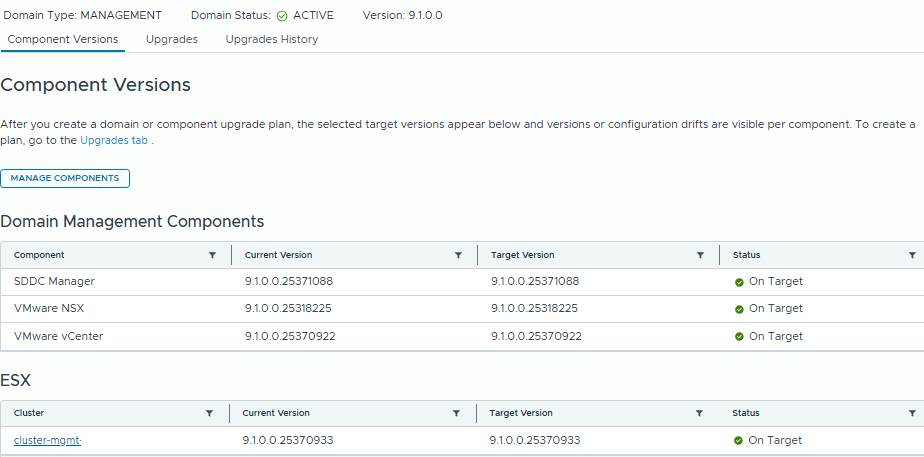
Upgrade all components in the Management Domain following the recommended sequence. After verifying the Management Domain is healthy, continue with the Workload Domain upgrades.
That’s it for today’s blog, Thank you for reading.