In the VMware (by Broadcom) ecosystem—and across industries in general—containerization and Kubernetes platforms have become the de-facto standard for building and running modern applications. VMware enables organizations to run Kubernetes clusters and Kubernetes pods alongside traditional virtual machines by leveraging vSphere Kubernetes Services (VKS), formerly known as vSphere with Tanzu. This unified platform allows enterprises to operate both VM-based and container-based workloads on the same vSphere infrastructure, simplifying operations and accelerating application modernization.
As organizations move away from traditional virtual machine–centric architectures, Kubernetes is increasingly adopted to manage both stateless and stateful workloads at scale, bringing consistency, portability, and automation to modern application delivery. To support this shift, VMware actively contributes to several open-source projects that play a critical role in the Kubernetes ecosystem, such as Velero, Antrea, and Harbor. These projects help address key enterprise Kubernetes requirements, including data protection, container networking, and secure container image management, making them essential building blocks for running Kubernetes workloads in production environments.
Velero is an open-source project widely adopted for backing up and restoring Kubernetes environments. It enables administrators to protect Kubernetes namespaces, cluster resources, and persistent volumes, making it an essential component of any production-grade Kubernetes platform. In this blog, we will explore how Velero is used to back up Kubernetes namespaces and resources, understand its core concepts, and see how it fits into enterprise Kubernetes environments, especially within the VMware ecosystem.
For any backup solution, the first step is to decide the storage location where backup data will be stored. In this demo, I am using the local storage of a lab server as the target location for storing backup files. To achieve this, I am using MinIO, an open-source, S3-compatible object storage platform that can be deployed on-premises. MinIO provides functionality similar to AWS S3, making it a popular choice for Kubernetes labs and on-prem environments where cloud object storage is not available. Additionally, local storage is used to create Persistent Volumes (PV) and Persistent Volume Claims (PVC), which in turn provide the underlying storage for the MinIO S3 buckets which will be used by Velero.
Velero and minIO runs in Kubernetes
MinIO provides S3-compatible object storage
Velero stores:
Cluster metadata (YAMLs)
PV snapshots (if supported)
Backup tar files → MinIO bucket
let’s prepare the local storage directory where we will store the backup files. I have 3 nodes, one control plan and 2 worker nodes. I am creating a directory on node-01 for storing the backup files.
laborant@dev-machine:~$  kubectl get nodes
NAME STATUS ROLES AGE VERSION
cplane-01 Ready control-plane 51m v1.35.0
node-01 Ready 51m v1.35.0
node-02 Ready 51m v1.35.0
laborant@dev-machine:~$

aborant@node-01:~$
laborant@node-01:~$  sudo mkdir -p /mnt/minio-data
sudo chown -R 1000:1000 /mnt/minio-data
sudo chmod -R 775 /mnt/minio-data
laborant@node-01:~$

laborant@node-01:~$  ls -lrt /mnt/minio-data/
total 0
laborant@node-01:~$
Now let’s create the namespace for minIO and create PV and PVC backed by the above directory.
laborant@node-01:~$  vi minio-local-pv.yaml
laborant@node-01:~$  vi minio-pvc.yaml
laborant@node-01:~$ cat minio-*
apiVersion: v1
kind: PersistentVolume
metadata:
  name: minio-local-pv
spec:
  capacity:
    storage: 10Gi
  accessModes:
    - ReadWriteOnce
  persistentVolumeReclaimPolicy: Retain
  storageClassName: local-storage  ### by storage class, PV and PVC will be bound to each other
  local:
    path: /mnt/minio-data  ### local directory details given here
  nodeAffinity:   ### as this directory exists only on node01, we used nodeAffinity for this.
    required:
      nodeSelectorTerms:
      - matchExpressions:
        - key: kubernetes.io/hostname
          operator: In
          values:
          - node-01
apiVersion: v1
kind: PersistentVolumeClaim
metadata:
  name: minio-pvc
  namespace: minio
spec:
  accessModes:
    - ReadWriteOnce
  resources:
    requests:
      storage: 10Gi
  storageClassName: local-storage

laborant@node-01:~$
aborant@node-01:~$
laborant@node-01:~$  kubectl create namespace minio
namespace/minio created
laborant@node-01:~$  kubectl apply -f minio-local-pv.yaml
persistentvolume/minio-local-pv created
laborant@node-01:~$  kubectl apply -f minio-pvc.yaml
persistentvolumeclaim/minio-pvc created
laborant@node-01:~$  kubectl -n minio get pv,pvc
NAME                              CAPACITY   ACCESS MODES   RECLAIM POLICY   STATUS   CLAIM             STORAGECLASS    VOLUMEATTRIBUTESCLASS   REASON   AGE
persistentvolume/minio-local-pv   10Gi       RWO            Retain           Bound    minio/minio-pvc   local-storage   <unset>                          14s

NAME                              STATUS   VOLUME           CAPACITY   ACCESS MODES   STORAGECLASS    VOLUMEATTRIBUTESCLASS   AGE
persistentvolumeclaim/minio-pvc   Bound    minio-local-pv   10Gi       RWO            local-storage   <unset>                 9s
laborant@node-01:~$
Next we will install minIO in standalone mode using helm charts.
laborant@dev-machine:~$
laborant@dev-machine:~$  helm repo add minio https://charts.min.io/
"minio" has been added to your repositories

laborant@dev-machine:~$  helm repo update
Hang tight while we grab the latest from your chart repositories…
…Successfully got an update from the "minio" chart repository
Update Complete. ⎈Happy Helming!⎈

laborant@dev-machine:~$
laborant@dev-machine:~$  helm install minio minio/minio --namespace minio --set mode=standalone --set replicas=1 --set rootUser=minioadmin --set rootPassword=minioadmin123 --set persistence.enabled=true --set persistence.existingClaim=minio-pvc --set nodeSelector."kubernetes.io/hostname"=node-01 --set resources.requests.memory=512Mi --set resources.requests.cpu=250m --set resources.limits.memory=1Gi --set resources.limits.cpu=500m --set consoleService.type=NodePort
NAME: minio
LAST DEPLOYED: Wed Jan 21 15:31:36 2026
NAMESPACE: minio
STATUS: deployed
REVISION: 1
DESCRIPTION: Install complete
TEST SUITE: None
NOTES:
MinIO can be accessed via port 9000 on the following DNS name from within your cluster:
minio.minio.cluster.local
MinIO deployed successfully, now let’s check the MinIO nodes and services deployed with MinIO. We can see the MinIO GUI is accessible on the node port 32001, lets access the minIO GUI at http://node01:32001.
laborant@dev-machine:~$ kubectl get pods -n minio
NAME READY STATUS RESTARTS AGE
minio-5f45b57774-ckdjp 1/1 Running 0 3m50s

laborant@dev-machine:~$  kubectl get svc -n minio
NAME TYPE CLUSTER-IP EXTERNAL-IP PORT(S) AGE
minio ClusterIP 10.103.76.21 9000/TCP 3m58s
minio-console NodePort 10.102.215.217 9001:32001/TCP 3m58s
laborant@dev-machine:~$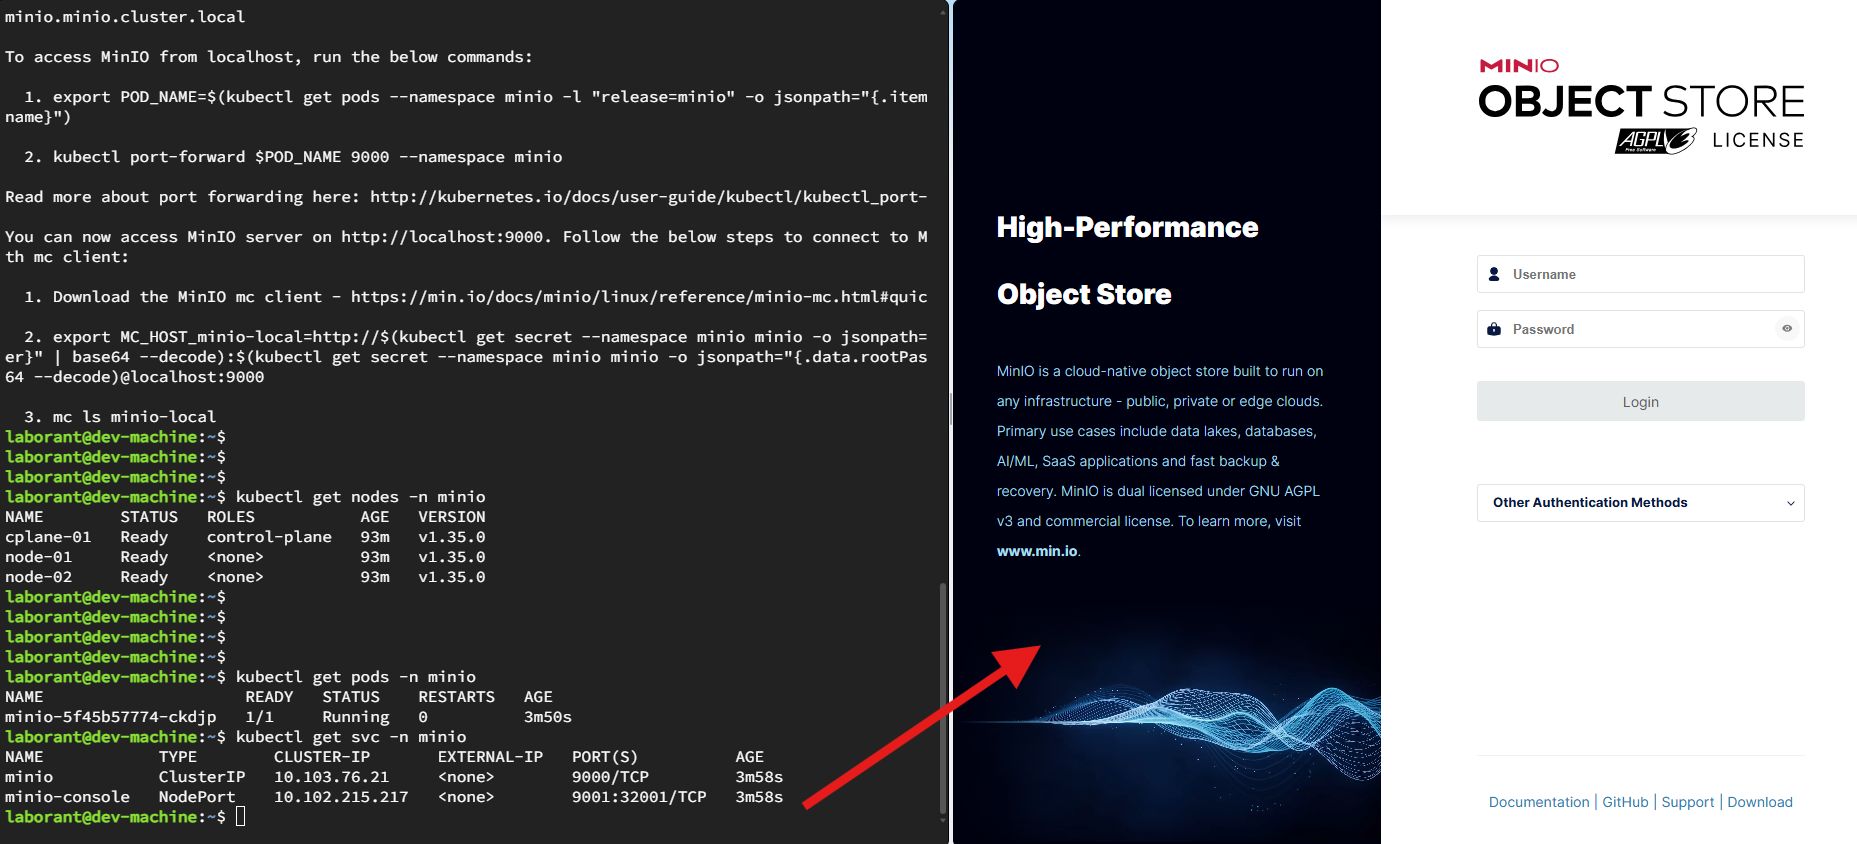
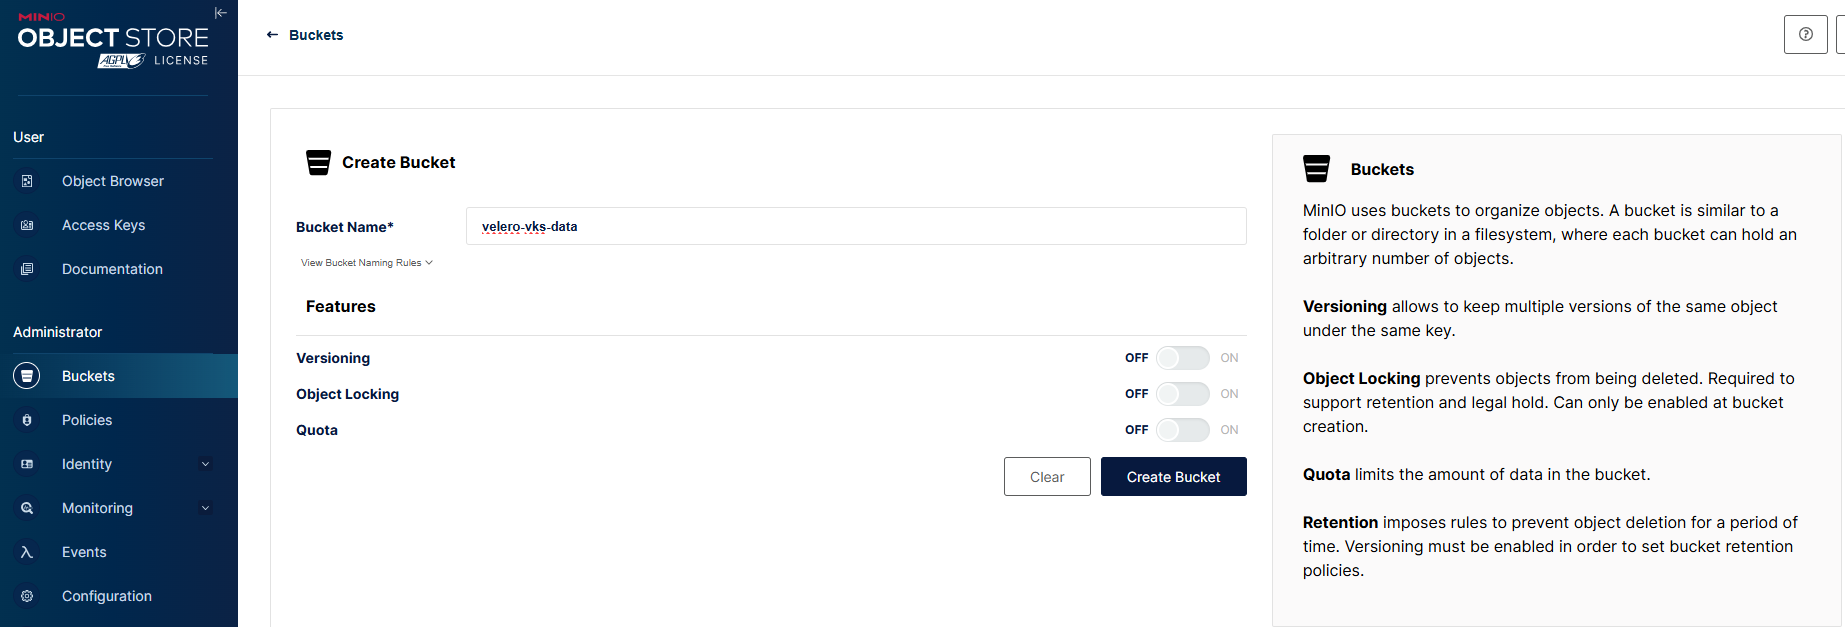
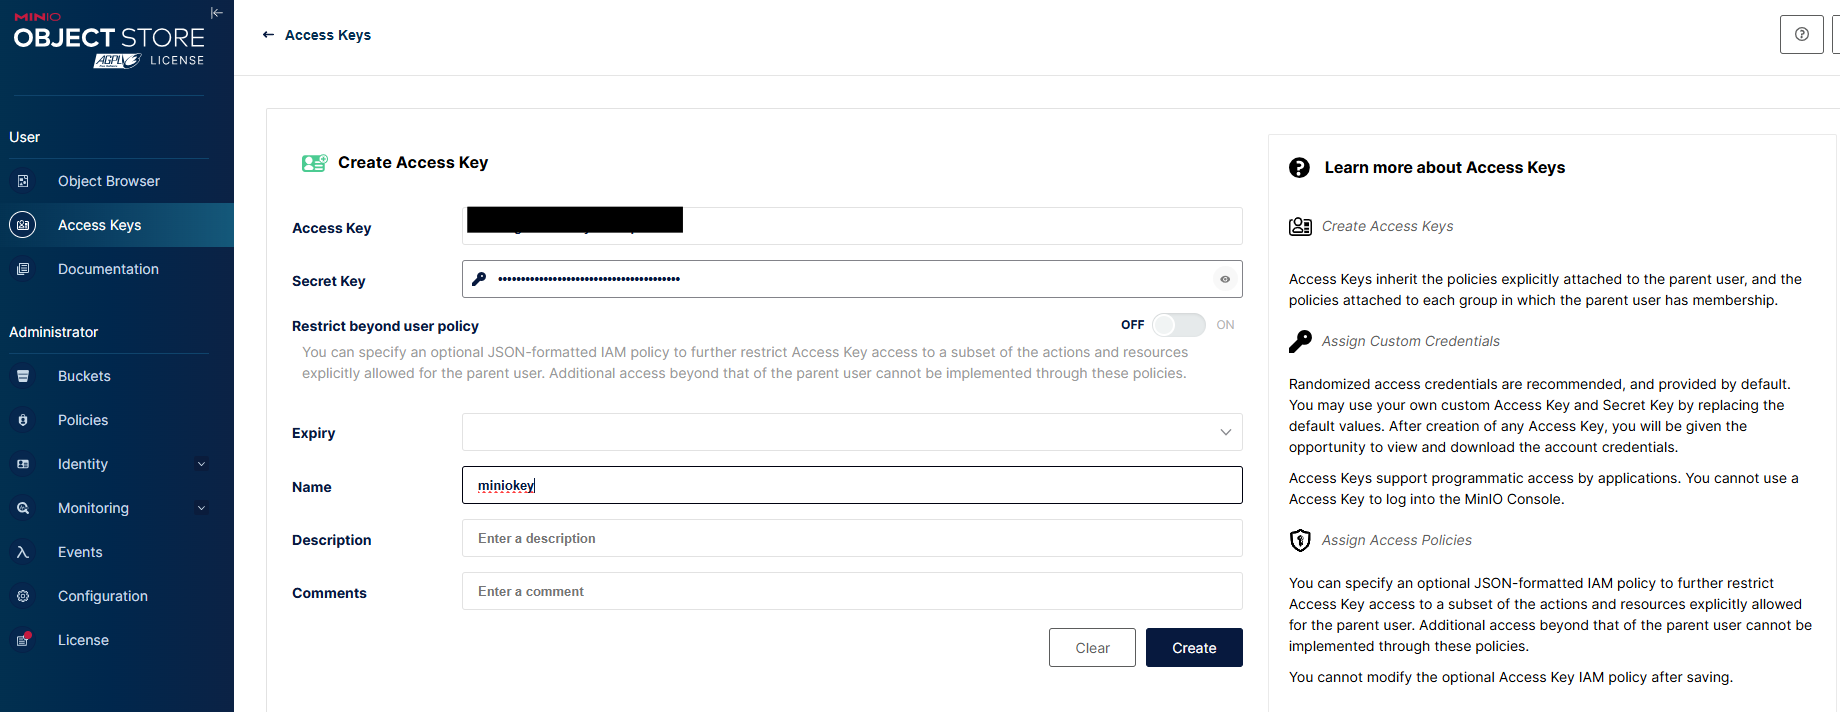
Let’s login with the credentials and create a bucket and an accesskey. We use this bucket ‘velero-vks-data‘ to store our kubernetes backups. and we need to create an accesskey so that we will tell our velero server to access minio server using this accesskey. I have named access key as ‘miniokey‘. When you create accesskey, please save the values for accesskey and secretkey for future use.
With this we have confirmed that MinIO is working as per our expectations. Now lets download and install Velero.
laborant@dev-machine:~$  wget https://github.com/vmware-tanzu/velero/releases/download/v1.17.2/velero-v1.17.2-linux-amd64.tar.gz
--2026-01-21 15:50:43-- https://github.com/vmware-tanzu/velero/releases/download/v1.17.2/velero-v1.17.2-linux-amd64.tar.gz
-----
-----
HTTP request sent, awaiting response… 200 OK
Length: 58496707 (56M) [application/octet-stream]
Saving to: ‘velero-v1.17.2-linux-amd64.tar.gz’

velero-v1.17.2-linux-amd64.tar.gz 100%[=========================================================================================================>] 55.79M 32.7MB/s in 1.7s

2026-01-21 15:50:45 (32.7 MB/s) - ‘velero-v1.17.2-linux-amd64.tar.gz’ saved [58496707/58496707]
laborant@dev-machine:~$
laborant@dev-machine:~$
laborant@dev-machine:~$ tar -xvf velero-v1.17.2-linux-amd64.tar.gz
velero-v1.17.2-linux-amd64/LICENSE
velero-v1.17.2-linux-amd64/examples/minio/00-minio-deployment.yaml
velero-v1.17.2-linux-amd64/examples/nginx-app/README.md
velero-v1.17.2-linux-amd64/examples/nginx-app/base.yaml
velero-v1.17.2-linux-amd64/examples/nginx-app/with-pv.yaml
velero-v1.17.2-linux-amd64/velero
laborant@dev-machine:~$
laborant@dev-machine:~$
laborant@dev-machine:~$ ls -lrt
total 57136
-rw-rw-r-- 1 laborant laborant 58496707 Jan 16 03:55 velero-v1.17.2-linux-amd64.tar.gz
laborant@dev-machine:~$ sudo mv velero-v*/velero /usr/local/bin/
laborant@dev-machine:~$ velereo version
-bash: velereo: command not found
laborant@dev-machine:~$ velero version
Client:
Version: v1.17.2
Git commit: 7013a4097f17a97a0201c0ad3c9dd3f810d32bf6
laborant@dev-machine:~$Create a txt file with the accesskey and secret key details.
laborant@dev-machine:~$
laborant@dev-machine:~$ cat credentials-velero
[default]
aws_access_key_id=XXXXXXXXXXXXXXXXXXXXXXXX
aws_secret_access_key=YYYYYYYYYYYYYYYYYYYY
EOF
laborant@dev-machine:~$
While configuring Velero, it is important to ensure that the bucket name is correct, as this is where all backup data and metadata will be stored.In this setup, the provider is specified as aws, even though the backend storage is not AWS S3. This is expected behavior because MinIO is S3-compatible, and Velero uses the AWS plugin to communicate with any S3-compatible object storage. As long as the MinIO endpoint, credentials, and bucket configuration are correct, Velero will function the same way as it does with AWS S3.
laborant@dev-machine:~$
laborant@dev-machine:~$  velero install \
  --provider aws \
  --plugins velero/velero-plugin-for-aws:v1.9.0 \
  --bucket velero-vks-data \
  --secret-file ./credentials-velero \
  --backup-location-config \
region=minio,\
s3ForcePathStyle=true,\
s3Url=http://minio.minio.svc.cluster.local:9000 \
  --use-node-agent \
  --snapshot-location-config region=minio
CustomResourceDefinition/backuprepositories.velero.io: attempting to create resource
CustomResourceDefinition/backuprepositories.velero.io: attempting to create resource client
-----
-----
-----
-------
VolumeSnapshotLocation/default: created
Deployment/velero: attempting to create resource
Deployment/velero: attempting to create resource client
Deployment/velero: created
DaemonSet/node-agent: attempting to create resource
DaemonSet/node-agent: attempting to create resource client
DaemonSet/node-agent: created
Velero is installed! ⛵ Use 'kubectl logs deployment/velero -n velero' to view the status.
laborant@dev-machine:~$
laborant@dev-machine:~$
laborant@dev-machine:~$
laborant@dev-machine:~$  kubectl get pods -n velero
NAME                      READY   STATUS    RESTARTS   AGE
node-agent-gdk9k          1/1     Running   0          22s
node-agent-lr5pv          1/1     Running   0          22s
node-agent-qlc8q          1/1     Running   0          22s
velero-7746975758-clxhn   1/1     Running   0          22s
Velero installed successfully, lets check if the Velero can see the MinIO bucket. let’s check the Velero backup location status. We can see Velero correctly detected the ‘velero-vks-data‘ bucket and showing Available state.
laborant@dev-machine:~$  velero backup-location get
NAME      PROVIDER   BUCKET/PREFIX     PHASE       LAST VALIDATED                  ACCESS MODE   DEFAULT
default   aws        velero-vks-data   Available   2026-01-21 16:02:19 +0000 UTC   ReadWrite     true
laborant@dev-machine:~$
Now we can test the Backup functionality. I created a demo namespace, a configmap, and few kubernetes resources like deployment and service in demo namespace.
laborant@dev-machine:~$  kubectl create namespace demo
namespace/demo created
laborant@dev-machine:~$  kubectl get namespaces
NAME STATUS AGE
default Active 125m
demo Active 7s
kube-flannel Active 125m
kube-node-lease Active 125m
kube-public Active 125m
kube-system Active 125m
minio Active 60m
velero Active 5m30s
laborant@dev-machine:~$
laborant@dev-machine:~$
laborant@dev-machine:~$
laborant@dev-machine:~$  kubectl get all -n demo
No resources found in demo namespace.
laborant@dev-machine:~$

laborant@dev-machine:~$  kubectl get all -n demo
NAME READY STATUS RESTARTS AGE
pod/todo-app-cfc964fcc-hg98v 1/1 Running 0 26s

NAME TYPE CLUSTER-IP EXTERNAL-IP PORT(S) AGE
service/todo-svc ClusterIP 10.106.109.155 80/TCP 7s

NAME READY UP-TO-DATE AVAILABLE AGE
deployment.apps/todo-app 1/1 1 1 26s

NAME DESIRED CURRENT READY AGE
replicaset.apps/todo-app-cfc964fcc 1 1 1 26s

laborant@dev-machine:~$  kubectl get configmap -n demo
NAME               DATA   AGE
kube-root-ca.crt   1      87s
todo-html          1      43s
Now I take a backup for this demo namespace, I named it demo-backup.
aborant@dev-machine:~ velero backup create demo-backup --include-namespaces demo
Backup request "demo-backup" submitted successfully.
Run  velero backup describe demo-backup or velero backup logs demo-backup for more details.

laborant@dev-machine:~$ velero backup get
NAME STATUS ERRORS WARNINGS CREATED EXPIRES STORAGE LOCATION SELECTOR
demo-backup Completed 0 0 2026-01-21 16:15:10 +0000 UTC 29d default
We can also verify that backup files are stored on minIO bucket.
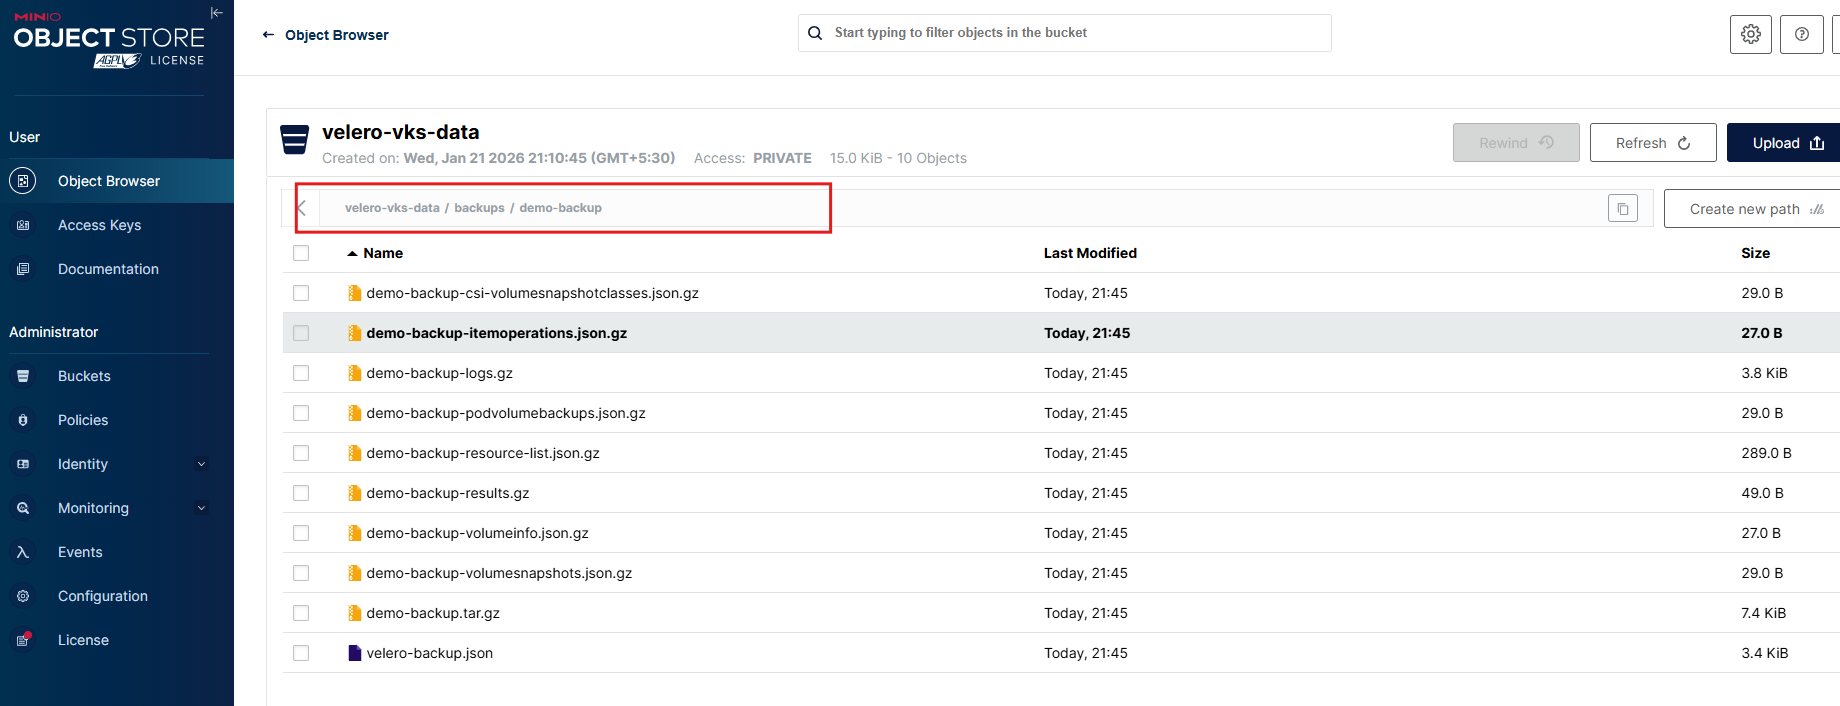
Now, let’s try delete the demo namespace and see if we can restore the namespace.
laborant@dev-machine:~$  kubectl delete namespace demo
namespace "demo" deleted
laborant@dev-machine:~$
laborant@dev-machine:~$  kubectl get ns demo
Error from server (NotFound): namespaces "demo" not found
laborant@dev-machine:~$
aborant@dev-machine:~$
laborant@dev-machine:~$ velero restore create demo-restore --from-backup demo-backup
Restore request "demo-restore" submitted successfully.
Run velero restore describe demo-restore or velero restore logs demo-restore for more details.
laborant@dev-machine:~$ ^C
laborant@dev-machine:~$ velero restore get
NAME BACKUP STATUS STARTED COMPLETED ERRORS WARNINGS CREATED SELECTOR
demo-restore demo-backup Completed 2026-01-21 16:21:36 +0000 UTC 2026-01-21 16:21:37 +0000 UTC 0 1 2026-01-21 16:21:36 +0000 UTC <none>
laborant@dev-machine:~$
laborant@dev-machine:~$ kubectl get namespaces
NAME STATUS AGE
default Active 141m
demo Active 2m1s
kube-flannel Active 141m
kube-node-lease Active 141m
kube-public Active 141m
kube-system Active 141m
minio Active 76m
velero Active 21m
laborant@dev-machine:~$ kubectl get all -n demo
NAME READY STATUS RESTARTS AGE
pod/todo-app-cfc964fcc-hg98v 1/1 Running 0 2m8s
NAME TYPE CLUSTER-IP EXTERNAL-IP PORT(S) AGE
service/todo-svc ClusterIP 10.110.237.64 <none> 80/TCP 2m8s
NAME READY UP-TO-DATE AVAILABLE AGE
deployment.apps/todo-app 1/1 1 1 2m8s
NAME DESIRED CURRENT READY AGE
replicaset.apps/todo-app-cfc964fcc 1 1 1 2m8s
laborant@dev-machine:~$ We can see restore is completed and all the resources in demo namespace are restored correctly.
With this, we have successfully tested Velero backups using MinIO as the object storage and validated both backup and restore workflows at the namespace level. This confirms how Velero can be effectively used for Kubernetes disaster recovery and migration scenarios.
In a similar way, vmware-tanzu/velero-plugin-for-vsphere works on the same Velero principles. Velero is the underlying backup and restore engine, while the vSphere plugin extends its capabilities to integrate with vSphere storage and snapshots. This makes it especially useful for protecting Kubernetes clusters running on vSphere, such as vSphere Kubernetes Service (VKS) clusters, where both cluster state and persistent volumes can be backed up and restored seamlessly.
That’s it for today’s blog — thank you for reading.